Showing posts with label Homemade Basics. Show all posts

Saturday, May 4, 2013

Biscuits


The other day I was making biscuits for breakfast. I went to my blog to get the recipe and realized I never posted it. So here it is, my favorite biscuit recipe. I serve them with jam or honey. The next day, the leftovers are split open, topped with cheese (melted under the broiler) and then topped with a fried egg.


Biscuits
Serving Size = Around 8 biscuits
  • 2 cups all purpose flour
  • 1 tablespoon sugar
  • 3 teaspoons baking powder
  • 1/2 teaspoon salt
  • 1/2 cup of butter
  • 1 egg
  • 2/3 cup of milk
  1. In a food processor, mix together the dry ingredients, pulse to mix. Chop up the stick of butter into 1 tablespoon pieces. Add to processor and quickly pulse until it's a bit thicker than sand.
  2. In a bowl, mix together the egg and milk. Turn the processor on, add the egg mixture, and pulse until it forms a ball.
  3. Put a bit of flour on a surface, remove the dough from the processor and knead about 8 or 10 times, until it comes together. Roll out into about a 1-inch rectangle. Using a drinking glass, or biscuit cutter, cut out about 8 biscuits.
  4. Place onto a greased baking sheet, and bake in a preheated 450F oven for 8 - 10 minutes.
  5. When done, brush the tops with melted butter (optional).

Wednesday, March 6, 2013

Homemade Flour Tortillas


At first, flour tortillas might seem like a lot of work, especially when you think about rolling each tortilla out, but honestly, they take no time at all. For this recipe, which makes 9 very large tortillas, it takes about 10 - 15 minutes total to mix the dough and roll each one out. Cooking time is seconds for each one. Most people with bigger families might consider doubling the recipe, but even that will only take about 15 - 20 minutes. Sure, it isn't as easy as opening a pre-made package, but the difference in flavor is night and day. I promise. And it's light-years healthier, too.

My favorite meal to serve these with: Picadillo


Homemade Flour Tortillas
Serving Size = 9, 10-12-inch tortillas
  • 2 cups all purpose flour
  • 1/4 teaspoon salt
  • 1 teaspoon baking powder
  • 1 tablespoon oil
  • 3/4 cup water
  1. Mix together the dry ingredients. Place water in a bowl and add the dry mixture. Mix until it comes together. Knead it for a minute or two, or until it becomes smoother.
  2. Divide into 3 pieces, then each piece into 3 more. Roll each tortillas out, keeping flour handy so nothing sticks. They will be about 10-inches, maybe 12. But you can make them any size you want, or even leave them thick instead of thin.
  3. Heat a large skillet over medium high heat. Toss one tortillas on and let it cook for a few seconds, turn and cook a few more seconds, remove to a plate. They should have some golden brown spots on them, when done.

Wednesday, August 22, 2012

Wheat Crackers


I've been obsessively reading parenting books lately (more on that over at Elsa's Baby Talk). Not because I'm having problems with my kids, but because I feel like I need to expand my knowledge in order to keep growing as a parent. While reading the book, I saw that it randomly mentioned snack time. And then it occurred to me.... I had no snacks in the house for my toddler. Since I had peanut butter, I thought instead of bread, which takes several hours to make, I would make some crackers instead. I went with wheat because I thought it would be a bit healthier. I plan to keep using this recipe as a starting point for several other flavors I have in mind.


Wheat Crackers
Original Recipe: Allrecipes
  • 1 3/4 cups whole wheat flour
  • 1 1/2 cups all purpose flour
  • 3/4 teaspoon salt
  • 1/3 cup vegetable oil (I use grapeseed oil)
  • 1 cup water
  • Salt for sprinkling
  1. Preheat oven to 350F.
  2. Mix everything together until just combined.
  3. I changed the recipe at this point. Divide the dough into two balls (I have very large baking sheets, you might need to divide yours into three if you have smaller baking sheets). Flour a surface lightly, and roll out the dough until it's super thin (1/8 inch or less). You will want it super thin because it crisps up much better in the oven. If it's too thick, it will take forever and may even end up like a rock,
  4. Move it over to an ungreased baking sheet. Make lines in the dough with a knife to whatever size you want them to be, but do not cut completely through. Then poke every cracker with a fork a few times (all the way through the dough). Sprinkle on more salt if you want.
  5. Bake for 20 minutes, or longer, until golden brown and crisp (it doesn't crisp up too much more after it's removed from the oven, so let it crisp in the oven).
  6. Let cool and break apart. Repeat with remaining dough.

Monday, February 27, 2012

Brownies


I've been wanting to try several fancy brownie recipes that I've see on Pinterest, but my pantry has been a bit on the empty side lately. We keep putting off grocery shopping for some reason. We always say, "Next weekend, let's go grocery shopping and really stock up." And then the weekend arrives, and we end up driving to towns we've never been to, going antiquing, and checking out the local activities. As much fun as this is, I think we actually need to go grocery shopping at some point.

By the way, if you have a toddler that wants to grab everything when you go into a fragile store, here's a tip from Aunt B's Kitchen: Give the kiddo a toy for each hand. If their hands are busy, they're less likely to grab everything in sight.

This comment was left on my Facebook page. Thanks Aunt B! Click here to see Aunt B's Facebook page.

Ok, back to the brownies now. So, with a sparse pantry I tried to decide what tasty treat I could make. I wanted something simple because my toddler was next to me and wanted to help. I wanted something fast because, well, I wanted to eat something sweet as soon as possible, but also because my 4-month-old was napping and I knew that would end soon. After some thought, I went with brownies. They are one of the easiest things to bake. You need cocoa powder, flour, sugar, and a few other common ingredients. Some recipes do call for solid chocolate that you have to melt first, which I've made, but I prefer this one because I always have cocoa powder in my house. If you follow the recipe below, with no extra additions, you will get a brownie that's a little more cake-like than some. It does not taste like a cake, it's still a little chewy and dense, but not as chewy and dense as some (you know, the ones that border on fudge). If you want a dense brownie, then add some chocolate chips to help out.

By the way, I love icing on my brownies even though I didn't add any this time around (although, I did drizzle some chocolate sauce over them). For a few icing ideas, head on over to Premeditated Leftovers. Mmmm can't wait to try some of these!

The dry ingredients (in lovely vintage pyrex!) 
My toddler mixed the dry and wet ingredients
Mmmmmm brownies!
Brownies
Serving Size = 1 8-inch square pan
Original Recipe
  • 1/2 cup unsalted butter, melted
  • 1 cup white sugar
  • 2 eggs
  • 1 teaspoon vanilla extract
  • 1/3 cup unsweetened cocoa powder
  • 1/2 cup all-purpose flour
  • 1/4 teaspoon salt
  • 1/4 teaspoon baking powder
  1. Preheat oven to 350F and grease an 8x8-inch baking dish.
  2. Combine the cocoa powder, flour, sugar, baking powder, and salt. Set aside.
  3. Combine the melted butter (melted but not hot, might need to let it cool a bit), vanilla, and eggs. Mix until just combined.
  4. Add the dry to the wet and mix until JUST combined, do not over mix.
  5. Spread into the baking dish and bake for 25-30 minutes, or until inserted toothpick comes out clean. Let cool, cut and serve. I also drizzled some chocolate sauce over mine.
  6. Note: I've also doubled the recipe and poured it into a 9x13-inch pan and it worked perfectly. I had to cook it for about 35 - 40 minutes.
Does anyone have any delicious icing recipes that would go well with brownies? If so, feel free to copy/paste the recipe into the comments or leave a link to it. I would love to check them out.

Linking to: Mix It Up Monday, Melt In Your Mouth Monday, This Week's Cravings, Mangia Mondays, Savvy Homemade Monday, Hearth and Soul

Wednesday, February 22, 2012

Homemade Chocolate Syrup and Iced Mocha (Frappuccino)


Today I am sharing two easy recipes with you. The first is homemade chocolate syrup. It's so easy to make, there really is no reason to buy it from the store ever again. The taste is definitely equal to store bought, but I would say even better. I add it to milk for my toddlers chocolate milk, over ice cream, or to iced coffee --- the other recipe I'm sharing with you. I LOVE coffee and chocolate, so combining them is an amazing experience for me. Also, notice the foam at the top. I have a Vitamix blender and if I blend it a few seconds longer than normal, it creates a beautiful foamy top. If your blender doesn't do that, then just add some whipped cream.

As for the strength of the coffee, I just use leftover coffee from the morning. We drink our coffee on the strong side and it works perfectly. I'm sure whatever coffee you have leftover will work perfectly. 

Our coffee recipe is roughly:
  • 6 cups of water to 1/2 cup of ground coffee.

Adding chocolate syrup to make chocolate milk
Also good as an ice cream topper
Chocolate Syrup
Serving Size = About 2 cups
  • 1 1/2 cups sugar
  • 3/4 cup unsweetened cocoa powder
  • 1 cup water
  • Dash of salt
  • 1 teaspoon vanilla
  1. In a medium or large saucepan (it bubbles up a lot), mix everything but the vanilla. Bring to boil, cook one minute, (stir often) remove from heat and stir in vanilla.
  2. Cool and store in fridge.
The foam
Drizzle with chocolate
Iced Mocha (Frappuccino)
Serving Size = 2, 8oz cups
  • 3 tablespoons sugar
  • 1 cup coffee
  • 1 cup milk
  • 2 cups ice
  • 4 tablespoons chocolate syrup
  • Extra ice to add after blending
  1. Add everything to a blender and blend. Adjust to taste. Pour into glasses and add some extra ice.
Linking to: Full Plate Thursday, Foodie Friday, Gallery of Favorites

Tuesday, December 20, 2011

Chocolate Pudding


I've made chocolate pudding before and it didn't turn out very well. I've always assumed it was because I used cheap chocolate, but apparently not. I used Hershey's unsweetened cocoa powder and it worked beautifully. I was thinking how I should post a cookie recipe since Christmas is around the corner, but ya know what? Everyone makes cookies and brings them to the Christmas party, why not take pudding instead? Not only will kids go crazy over this but adults will love it too.

And as you already know, I've been in a funk lately. I haven't been in the Christmas spirit at all and the rainy/soggy/cold/icky/nasty/cloudy weather isn't helping either. So over the weekend I decided to stop sitting around and made myself useful. I was determined to accomplish something... anything. So here's what I did:
  1. Drum roll please..... I FINALLY learned how to use my sewing machine after owning it for over a YEAR. I sewed some curtains for my kitchen. All I need to do is attach some ribbon and it will be done.
  2. I cleaned everything. The appliances, floors (washed, vacuumed), polished tables, did laundry, did the dishes... etc etc etc
  3. Last week we smoked a turkey and I put the carcass in the freezer. So I pulled it out and made several cups of turkey stock.
  4. I made outdoor decorations, more info on those can be found at my family blog.
  5. Played outside with Mimi. I felt like I hadn't been outside in ages and the weather wasn't GREAT, but it was better than normal. So we put on our coats and hats and headed outside. Lots of swinging, sliding, jumping and playing in the dirt.
And on Monday I bought stocking stuffers for the kids. Emmett also had his 2 month doc appointment and the little guy now weighs 11 lbs and is 25 inches long! He's growing up fast!
    So I did get a few things done. I'm really happy I figured out how to use my sewing machine though. I plan to buy some material later and make curtains for the living room as well. I really enjoy sewing. I'm excited to make more... stuff... whatever it will be.

    Non-GMO cornstarch, love it
    Let the pudding cool to room temperature
    Chocolate Pudding
    Serving Size = 2 cups (I recommend doubling the recipe)
    Original Recipe: The Frugal Girl
    • 2 1/2 tablespoons cocoa powder
    • 1/2 cup sugar
    • Pinch of salt
    • 2 cups of milk, divided
    • 3 tablespoons cornstarch
    • 3/4 teaspoon vanilla
    • Water
    1. In a medium saucepan, mix together the cocoa powder and just enough water to create a smooth paste. Stir in the sugar and salt. Add 1 1/2 cups of milk.
    2. Heat the mixture over medium heat, stirring regularly, until it starts to boil. Go ahead and mix the cornstarch and reserved 1/2 cup of milk together.
    3. Once the mixture reaches a boil, add the cornstarch mixture, stirring constantly until it comes back to a boil. Boil for 1 minute, stirring constantly.
    4. Remove from heat and stir in the vanilla. Pour the pudding into individual dishes or into one large bowl. Cool to room temperature and then refrigerate until cold. A skin will form, so if you want to avoid this, lay a piece of plastic wrap against the top of the pudding while it's cooling.
    5. Top with whipped cream and serve.

    Monday, November 14, 2011

    French Onion Soup and Croutons


    If you're pantry is empty, or if you want to save money.... OR if a newborn kept you awake all night and you want a very easy to make lunch, then here's your recipe.

    It's so easy a caveman could do it.
    hehehe
    Couldn't resist.

    Anyway, I made rye bread the other day to go with our steak dinner. Of course there were leftovers, so the next day I chopped up the extra bread and made croutons. This gave me the idea to make French onion soup because I could top it with croutons and cheese. I thought this would be more interesting than a salad. And I was right, much more interesting.... and tastier too. Plus, it's cold outside so it's perfect soup weather.

    Rye croutons
    Croutons
    Serving Size = 4 cups
    Original Recipe
    • 4 cups of breads
    • 2 teaspoons garlic salt (I just use garlic and salt)
    • 1/4 cup of butter, melted or use EVOO
    1. Preheat oven to 325F.
    2. Cut bread into 1 inch cubes. Toss with EVOO or melted butter until very lightly coated. Add seasoning and toss to coat (I just used garlic powder and salt).
    3. Place on a baking sheet and bake for 20-35 minutes, or until toasted and crispy.

    Start cooking the onions
    After a while they should start to caramelize
    Add the broth, parsley, simmer and serve
    French Onion Soup
    Serving Size = 2
    • 2 1/2 cups beef broth (you could also use chicken, vegetable or a combination)
    • 1/2 tablespoon of lemon juice
    • 1/2 teaspoon dried thyme
    • 1 bay leaf
    • 1 tablespoon of flour
    • 2 onions, thinly sliced
    • Salt/Pepper
    • 3 cloves of garlic, finely chopped
    • 1 tablespoon of parsley, chopped
    • Gruyere, Swiss cheese, or fontina
    • Croutons or bread (handful for each bowl or 1 slice per bowl)
    1. Place a stock pot on the stove and set the heat to medium. Add 1/4 stick of butter and let it melt.
    2. Slice the onions thinly (I slice them like thin onion rings) and add to the stock pot. Stir well and add the bay leaf, thyme, salt and pepper. Let the onions cook until they are golden brown and soft (about 25 or 30 mins). In the last few minutes, add the garlic and stir.
    3. Once the onions finish, add 1/4 cup or so of beef broth to deglaze the pan. Stir well so that the brown bits come off the bottom. Once the liquid evaporates, add the flour and stir. Turn the heat down to medium low to keep the flour from burning and cook for about 10 mins to remove the raw flour taste.
    4. Add the rest of the beef/chicken broth and the parsley. Adjust the heat to a simmer and let it cook for another 10 mins. Now it's ready to serve.
    5. Place the croutons on top of the soup, add the cheese and place under a broiler until the cheese melts and browns a bit. You could also just slice some bread, place the cheese on top, broil and then place on top of the soup. Garnish with parsley.

    Dear Santa,
    Did you see the stunning bowl at the top? Even though I love and adore it, I'm not sure it's made for French onion soup. Could you please deliver me a set of red Technique Flame 2 cup soup bowls that are made for onion soup? You know, the ones with the cute little handles that can also be used on the stovetop, in the oven, broiler, freezer, anywhere, any time, any place, completely amazing.... you get the point. :)
    Thanks so much,
    P.S. I promise to post more cookie recipes.


    Linking to: Mangia Mondays, Tuesday Night Supper Club, Tuesdays at the Table, Hearth and Soul

    Wednesday, September 14, 2011

    Crumbled Spicy Italian Turkey Sausage (for pizza)


    You could use this for something other than pizza, but this is what I used it for. I froze some of it for a future pizza as well. Usually our pizza night is vegetarian night, but I wanted to change things up a bit. Exciting, I know. We're wild and crazy like that here. :) Anyway, this turned out very well. Even my toddler was munching on it and to be honest it was probably a bit too spicy for her. Big success with lots of flavor. And yes, I used ground turkey. Maybe it's just the shows I watch, but every time I see a cooking show challenge and the contestants are given ground turkey to work with, they always throw a fit because they hate it. Really???? It's just ground turkey. You can add any flavor you want to it. If I'm ever in a cooking challenge and given ground turkey, I will be one happy lady. :)

    By the way, I only have about 6 more weeks until our son arrives. YIKES!!!!! I have so much to do!! I hope I get some energy to get things done because for the last few days I've been exhausted. Well, clearly I'm not too exhausted to cook or blog. I have my priorities. hehe

    Spice mixture
    Let the sausage cool a bit
    Pizza dough, before pre-baking
    Add your toppings
    Pizza!
    Crumbled Spicy Italian Turkey Sausage (for pizza)
    Serving Size = About 2 18-inch pizzas (I froze half for another day)
    • 2 pounds of ground turkey
    • Oil
    • 2 - 2 1/2 teaspoons of salt
    • 1 1/2 teaspoons black pepper
    • 4 teaspoons garlic powder
    • 1 teaspoon sugar (a ton of recipes I looked at added sugar, so I went ahead and did it, but I don't think it adds much)
    • 1 teaspoon oregano
    • 1 1/2 teaspoons fennel seeds (crush a bit)
    • 1/2 - 1 tablespoon paprika
    • 1 1/2 teaspoons red pepper flakes (or to taste)
    1. Add some oil to a saute pan and heat over medium.
    2. Mix the turkey with all of the spices. Add to the hot pan and cook until done (15 mins or so), breaking apart as it cooks. Taste and make sure the seasoning is good. Adjust as necessary. 
    3. Set aside so that it can cool. When the pizza is ready, crumble it over the top, bake and serve. I put half into the freezer for another day.
    By the way, this recipe is easy to eye ball. I have one set of measuring spoons and they have vanished (why do I get the feeling a tiny 2-year-old might be to blame?) so I had to wing it. I did have to adjust the seasoning to taste at the end but it didn't cause any problems at all.

    Linking to: Tuesday Night Supper Club, Full Plate Thursday, These Chicks Cook, Recipe Sharing Monday, Cast Party Wednesday

    Wednesday, September 7, 2011

    Flourless Chocolate Walnut Cookies (gluten free) and Powdered Sugar


    My husband and I spent the day working on our daughter and son's playroom.
    The following happened:
    1. My toddler ate an unknown amount of crayons
    2. But not before drawing on the floor, walls, door, window, etc.
    3. Toddler then stepped in blue paint and made little footprints across the crayoned floor
    4. Toddler saw that the window was wide open and threw random things into the yard
    5. Momma had a meltdown because toddler was making a mess
    6. Toddler ignored silly mommy and found a bottle of "Dreams" by Ana Sui, a lovely perfume mama hadn't worn in years, and then poured it all over the floor. Now toddler and playroom smell like the lovely "Dreams," which is no longer lovely and mama hopes to never smell it again
    7. Finally, the perfume scented toddler decided to take a nap at which point mama was jumping up and down with happiness
    The rest of the day was spent cleaning up the toddler mess, and since she was taking an extra long nap, I decided to make some cookies...... mostly for the joy that it brings to my family. haha! Yeah, right. Mostly because I was having a huge chocolate craving and my pregnancy hormones were out of control. So I remembered Alea at Premeditated Leftovers and her flourless chocolate cookie recipe. I've made flourless chocolate cake, so I knew they would be dense and rich, which was exactly what I was looking for. 

    A few suggestions ---- They do stick to the pan, so I might recommend lining it with parchment paper to be extra safe. Also, when the directions say, "a rounded tablespoon" stick with a rounded tablespoon. I made my first batch WAY too big and had to cook them longer, which dried them out. The second batch was small and did much better. Of course, if a few happen to crumble then you cannot serve them to your family. What kind of wife and mother would serve her family broken cookies?? NOT this one! Instead, I made sure to place those warm crumbled cookies into a bowl and top them with ice cream, then sit down and inhale them all. The things I do out of love for others. The sacrifices I make. Sheesh.

    Flourless Chocolate Walnut Cookies
    Serving Size = 3 dozen
    • 4 cups powdered sugar
    • 1 cup unsweetened cocoa powder
    • 3 eggs
    • 1 tablespoon vanilla extract
    • 1/2 teaspoon salt
    • 1 cup walnuts, chopped
    • 1/2 cup or so of chocolate chips (optional, my addition)
    1. Preheat oven to 350F.
    2. Mix the sugar, cocoa and salt together in a bowl or mixer. Add the eggs and vanilla, mix until combined. Add the walnuts and chocolate chips, mix again.
    3. Place rounded tablespoons onto a grease cookie sheet (might want to line it with parchment paper). Bake for 13 - 15 minutes or until crunchy on the outside and soft on the inside. 
    4. Remove from cookie sheet and let cool on wire rack.

    Powdered Sugar

    One last note. It IS possible to make your own powdered sugar. 
    You need: 
    • 1 cup of granulated sugar
    • 1 tablespoon of cornstarch
    You then have to figure out how to process it to powder. Either a blender, food processor, or a "bullet" type of machine. The "bullet" machine (I don't have a Bullet, but it's similar) worked the best for me.

    Keep in mind though that it is NOT in ANY WAY worth it to make your own powdered sugar. When you finish, and if you finish, your entire kitchen will be covered in white powder.
    Neighbors will think you use cocaine.
    People will gossip.
    Just avoid it and buy the stuff, trust me.

    Linking to: Full Plate Thursday

    Sunday, July 31, 2011

    Crepes


    I've been on pinterest a lot lately. By the way, thank you Alea at Premeditated Leftovers for suggesting that I sign up, I love it! Not only is it a great way to save recipes that I want to try, but hubs and I are making a playroom for Mimi and I have found a ton of new ideas that I am excited to try. So far, the plan is to paint the walls teal, the trim will be white, and the rest of the room will be accented with reds, pinks and either black or dark brown wooden furniture. I've pinned so many new projects that I'm excited to try, I'll remember to post pics as we go along.

    Other than being on the computer all morning I've also managed to do dishes, vacuum, sweep, start laundry and finally feed my child (hubs is outside mowing with a push mower in the extreme heat and it takes hours to do, poor guy). Luckily, I love to make crepes, because it seems like I'm either making crepes or pancakes for Mimi. Since I've made them 50 billion times, I feel like I've mastered them at this point. :) So here is the delicious recipe I use. I actually came up with this by myself from trial and error, only to find out that every recipe online is exactly the same. hehehe Oh well, that's ok. And my toddler loves to mix the batter, which is a great way to keep her busy, away from the TV, and spend time in the kitchen together. I love it.

    Dishes. No, that's not all. My dishwasher
    was completely full and this was leftover!
    A great deal I found at Big Lots. $10 for the set (glass, not plastic).
    Just wanted to share it with you.
    And these are the rest of the dishes I had to wash. Ahhh!!! hehe
    The batter.
    There were a few tiny lumps, so after this pic I whisked it better.


    I fill Mimi's with chocolate and fold into squares. I just roll mine up though.
    I should have made chocolate eyes to create a little face. Next time. :)
    Crepes
    Serving Size = Around 8 I believe?
    • 1 cup of milk
    • 1 cup of flour
    • 2 tablespoons unsalted butter, melted
    • Pinch of salt
    • 1/2 tablespoon of sugar
    • 2 eggs
    • 1/2 teaspoon or so of vanilla (optional)
    1. Place everything into a bowl and mix very well (use a whisk). 
    2. I use a hard anodized pan (about a 10 inch pan) and heat it over medium heat (I don't need to add butter or oil). Also, I wait until after I finish mixing the batter to turn the stove on. This allows the batter to sit for several minutes. When it gets nice and hot, I add about 1/3 cup (or a little less) of the batter and swirl around the pan. I let it cook for a minute or so and flip, cook another minute and remove. Let them cook as long as you want though, I don't like too much brown on them, just a touch. Continue until done.

    Saturday, July 2, 2011

    Taco Seasoning


    I can't believe I haven't posted this recipe yet. It's the only taco seasoning I've ever made and I have no intention of switching, it is that perfect. If you are a fan of the taco seasoning packets, then you will be happy with this mix because it's very similar. Of course you can cut back on the salt, or add more heat, which is why I love making my own spice blends instead of buying the packets from the store. Many reviewers only add a tablespoon or so to the meat, but I add all of the seasoning to 1 lb or 1 1/2 lbs of ground beef. It just depends how strong you like the flavor.

    Other than making tacos, my husband, toddler and I went out of town to shop and look around. We found a new store that sells several organic items. I walked out with strawberries and ate them all before we even got home. :) We had a great time (even though it was 10,000 degree outside). I was just glad to escape the house for a while. I've been obsessively cleaning the kitchen and doing the laundry for almost 2 weeks now. I'm going a tiny bit overboard, but it sure is nice to have a spotless kitchen. I hope I stay this way.

    Taco Seasoning I
    Original Recipe
    Serving Size = 1 ounce (I add all of it to 1 lb of ground beef)
    • 1 tablespoon chili powder
    • 1/4 teaspoon garlic powder
    • 1/4 teaspoon onion powder
    • 1/4 teaspoon crushed red pepper flakes
    • 1/4 teaspoon dried oregano
    • 1/2 teaspoon paprika
    • 1 1/2 teaspoons ground cumin
    • 1 teaspoon salt
    • 1 teaspoon black pepper
    1. Mix together and store in an air tight container.

    Saturday, June 18, 2011

    Italian Cold Pasta Salad


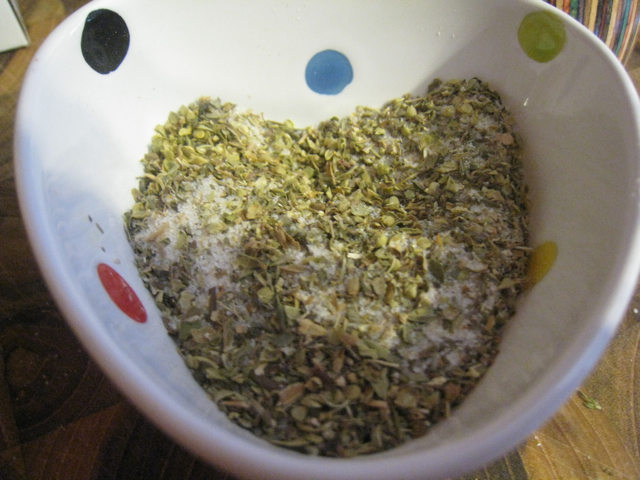
    The other day I was trying to think of something for lunch. Pasta salad just popped into my mind (probably because it's so hot out). Normally people make this with a bottle of Italian dressing, but I never buy dressing so that wasn't possible. I would love to use fresh herbs, but my herb garden is lacking slightly at the moment. As soon as I recover from whatever I currently have I plan to get my herbs going again. Anyway, I decided to put together an Italian herb dressing mix with dried herbs and it is now stored in my pantry. Any time that I need Italian dressing, I can pull out the mix and add some vinegar and oil et voila --- Italian dressing. 

    By the way, check out the two bowls (the one on the very top and the one on the very bottom). Both came from a store in TN. They are handmade pottery and they are absolutely stunning. You can easily buy them online with a quick search (which I plan to do in the future, shhh, don't tell hehehe). I love all pottery, as you know --- Mexican, Moroccan, Algerian, American --- I don't care. The only thing I would caution people about is to make sure you're not buying anything toxic. Some can be made with lead or other dangerous things. For lead, you can actually buy a lead test online if you're worried. Anyway, just discuss it with the store owner and do a bit of research to make sure. I would not recommend buying old pottery to cook/serve in, I would stick with new. And if you are REALLY unsure, then just use them for decoration, they are stunning to look at.


    Italian Dressing Mix
    • 1/2 teaspoon garlic powder
    • 1 tablespoon onion powder
    • 1/2 tablespoon white sugar
    • 2 tablespoons dried oregano
    • 1 teaspoon ground black pepper
    • 1/4 teaspoon dried thyme
    • 1 teaspoon dried basil
    • 1 tablespoon dried parsley
    Mix together ingredients, store in an airtight container. The original recipe adds the salt to the mix, but I prefer to add the salt to the dressing.
    1. For the dressing, whisk together 1/8 cup vinegar (I used tarragon vinegar) and 1/3 cup oil (I use grapeseed or avocado oil) and 1 tablespoons of the dry mix and salt/pepper to taste.
    Pasta Salad
    • 1/2 lb rotini pasta
    • 2 roma tomatoes, diced
    • 2 celery stalks, diced
    • 1/2 bell pepper, diced
    • 1/2 cup carrots, diced
    • 1/2 cup or so of chopped broccoli
    • Italian Dressing, as seen above (you may not need to use all of it though, just to taste)
    • 1/4 cup or so of Parmesan cheese
    1. Add any veggies you want, any amount you want. Boil the pasta, rinse it off under cold water. Mix everything together, add the dressing, mix and serve.

    Tuesday, February 8, 2011

    Apricot Bread and Baking Powder

    Let cool. My pan was a little too small for the bread. :(

    Have I told you that I've been obsessed with listening to ZZ Top while I'm cooking? I have no idea why. I never listened to them that often in the past. I can't seem to get enough Buffalo wings, blue cheese or ZZ Top. Je ne sais pas! I'm sure blasting "Sharp Dressed Man" in the kitchen is embarrassing my husband though. hehehe

    By the way, below is the creepiest toy I've ever seen in my life and I had to share it with you. I hate walking by an entire shelf of them in the store. They've been haunting me for months. They give me nightmares. Ok, they don't haunt me or give me nightmares, but could you blame me if they did??

    The Sing-A-Ma-Jigs - Hot Pink
    *Shudder*

    Ok, on to less creepy things now. Today I made apricot bread and served it with honey butter (just room temperature butter and honey mixed together, to taste). Before you try a piece, let it cool completely. The flavor is so much better when the bread is room temperature.

    Place apricots in a food processor.
    Chop them up.
    Place the apricots in boiling water.
    Chop up the nuts.
    Cream together the butter and sugar. Add the eggs.
    Pour into a dish and bake.
    Apricot Bread
    Serving Size = 1 loaf
    • 6 ounces dried apricots, chopped
    • 1 1/2 cups boiling water
    • 4 tablespoons butter, room temperature
    • 1 cup of sugar
    • 1 egg
    • 1 tablespoon vanilla (I probably used 1/2 tablespoon)
    • 2 3/4 cups all-purpose flour
    • 1/8 teaspoon salt
    • 2 teaspoons baking soda
    • 1/2 teaspoon baking powder (aluminum free)
    • 1/4 cup chopped nuts, optional (I used pecans)
    1. Preheat oven to 350F. Chop the apricots (I used a food processor) and pour the boiling water over them. Let them cool.
    2. Cream together the butter and sugar (I used my stand mixer). Add the egg and vanilla. Stir in the apricots and water. 
    3. In a separate bowl, mix together the flour, baking soda, salt, chopped nuts (if using) and baking powder. Slowly add the dry ingredients to the mixture while gently mixing.
    4. Pour the batter into a greased 9x5-inch loaf pan. Bake for 50-60 minutes, or until a toothpick inserted in the center comes out clean. Let cool for a bit, and then remove from pan and finish cooling on a wire rack. 
    My loaf came out dark, but I think that's normal because the original recipe picture looks dark as well. I probably should have knocked the temperature down to 325F though since I was using a glass pan. I'll try that next time.

    Are you out of baking powder? Here's a recipe for single acting, aluminum free baking powder. By the way, single acting means that when you add it to the recipe you need to bake it right away. It starts working once it hits the heat. Double acting means that it starts to act outside of the oven and then in the heat as well (two reactions), so you can leave it out longer before baking.

    Baking Powder (Single Acting) Recipe
    • 1 teaspoon baking soda
    • 2 teaspoons cream of tartar
    • 1 teaspoon cornstarch (optional)
    1. Can be stored up to 4 weeks, so I do not recommend making large batches.