Showing posts with label Dessert. Show all posts

Wednesday, October 5, 2016

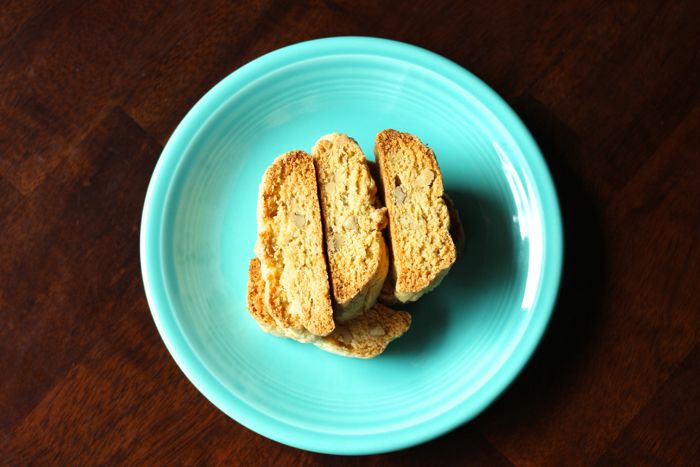
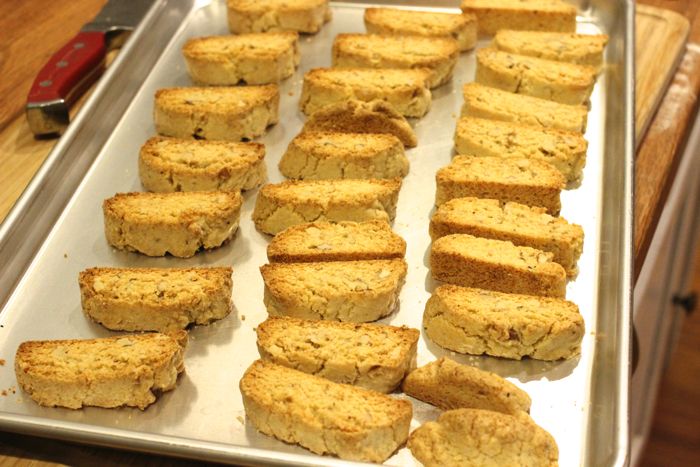
North African Biscotti


I'm not sure what to start with, so I guess I'll just say hello. It's been a while. Life had kept me busy, blogging has been on my mind, and I've finally found the time to start it up again. So if you've been following me for a while, and you're back here reading this post, thank you! I'll give a quick life update and then go on to the real reason we're here, the food. If you remember, I had a 5 year old girl, Mimi, and a newborn boy, EE. They've now grown up to a 7 year old and a 5 year old, and we welcomed a baby girl 2 years ago, baby Ru. We've also moved to a new house, I quit my part-time job and my husband increased his work hours. Like I said, we've been busy! But it's good to be back!

And now to the recipe. I love North African flavors, so I added them to a simple biscotti recipe. You'll notice that I didn't add extract of any kind. The reason I skip that is because I feel like it always over powers the dish, no matter how little I add, so I prefer to skip it. Feel free to add almond or vanilla extract though.

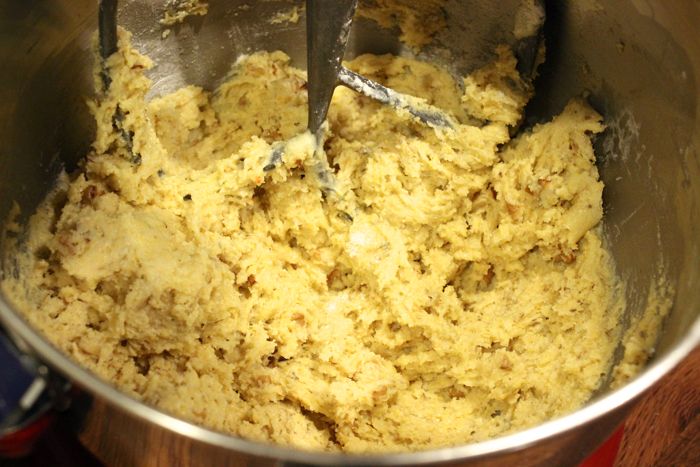
After adding the flour, do not over mix
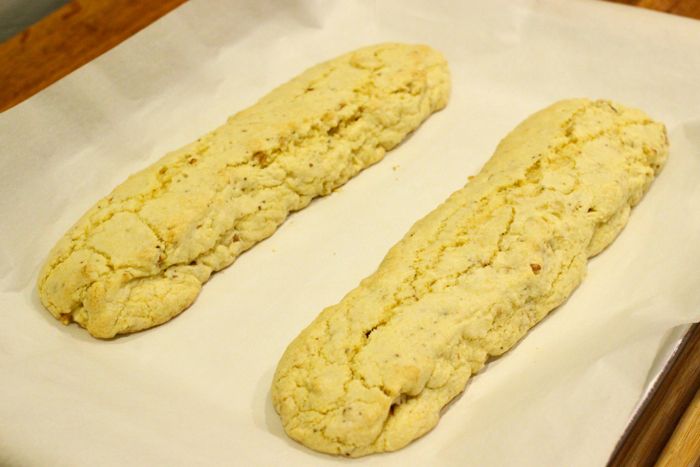
Shape into logs
Bake and then remove
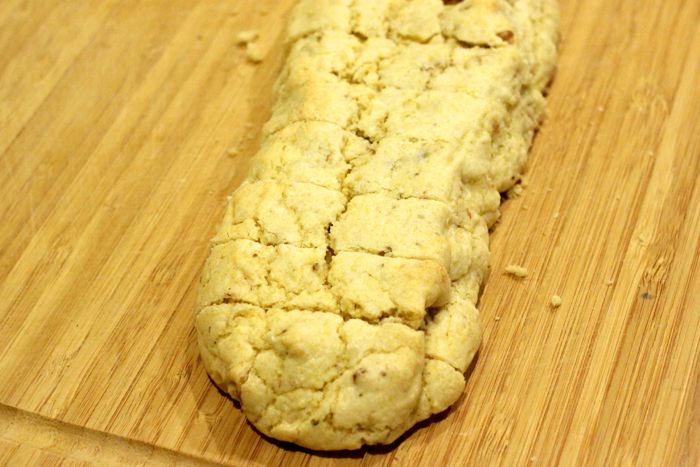
Cut and return to oven
Done when golden brown

North African Biscotti
Serving Size = 20+
  • 1 1/2 cups all-purpose flour
  • 1 1/2 teaspoons baking powder
  • 1/4 teaspoon salt
  • 1/2 cup yellow cornmeal
  • 2 teaspoons anise seed, ground
  • 1 teaspoon fennel seed, ground
  • 1 stick unsalted butter, at room temperature
  • 1 cup brown sugar
  • 2 large eggs
  • 3/4 cup finely chopped toasted almonds or walnuts
  1. Move rack to the center of the oven and preheat to 350F.
  2. Line a baking sheet with parchment paper.
  3. Whisk together the salt, baking powder, flour and cornmeal.
  4. With a stand mixer and paddle attachment, beat the butter and sugar together on medium speed for about 3 minutes, until very smooth (a hand mixer would work as well). Add the eggs, one at a time and beat for another 2 minutes, making sure to scrape the bowl. Add the ground anise and fennel.
  5. Reduce the speed to low and add the dry ingredients and the nuts, mixing only until incorporated.
  6. Divide the mixture in half, creating two 12 x 1 1/2 inch logs. The dough is sticky and the logs will be uneven.
  7. Bake for 15 minutes, or until the logs are lightly golden, but still soft and springy when touched.
  8. Transfer the baking sheet to a cooling rack for 30 minutes.
  9. Using a wide metal spatula, transfer the logs to a cutting board. With a serrated knife, cut across the logs to create short biscotti that are 3/4 inch pieces. Return the pieces to the baking sheet, standing them up on their short side and bake for another 15-20 minutes or until golden and firm.
  10. Transfer to a cooling rack and then serve.

Thursday, September 26, 2013

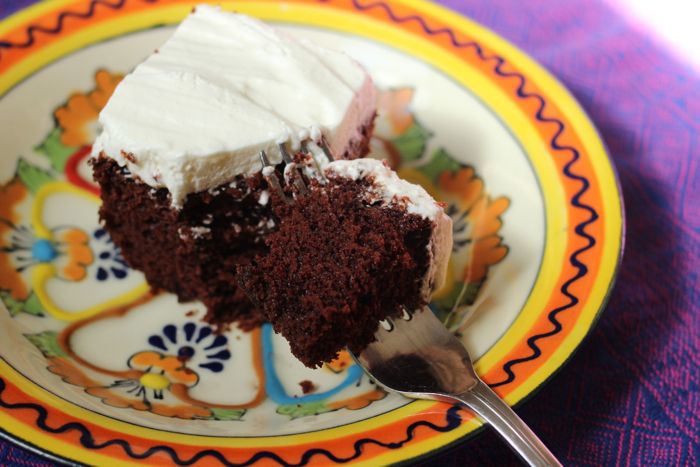
Egg Free, Dairy Free Chocolate Cake, Whipped Cream Cheese Frosting


During times when I desperately need to grocery shop, but the kids are asking for dessert, this is the recipe that I turn to. The cake is both egg and dairy free, so it is not only good for an empty fridge, but for people with allergies. It is very moist and light, with lots of chocolate flavor, but not overly sweet. The frosting is similar to whipped cream, very light, but cream cheese is added to help it along. Of course, the topping is not dairy free, so feel free to use another frosting if you're allergic.

Egg Free, Dairy Free Chocolate Cake
Serving Size = 1 9x13-inch pan
  • 3 cups all purpose flour
  • 1 teaspoon salt
  • 2 teaspoons baking soda
  • 1/2 cup unsweetened cocoa powder
  • 1 3/4 cups white sugar
  • 3/4 cup oil (I use grapeseed)
  • 2 tablespoons distilled white vinegar
  • 2 1/2 teaspoons pure vanilla extract
  • 2 cups cold water
  1. Preheat oven to 350F.
  2. Stir all of the dry ingredients together. 
  3. Add the wet ingredients and mix until combined well. I do not even use a mixer for this, just a spoon or fork.
  4. Pour into an ungreased 9x13-inch pan. Bake for 35 - 40 mins, or until toothpick comes out clean.
Whipped Cream Cheese Frosting
Serving Size = Enough to cover 9x13-in pan. Probably 4 or 5 cups.
  • 1 8-oz package of cream cheese softened to room temperature
  • 2 cups white sugar
  • 1 teaspoon vanilla extract
  • 2 cups heavy whipping cream
  1. Using a stand mixer with a whisk attachment, beat together the cream cheese and sugar until smooth, over medium speed. Add the vanilla. 
  2. When combined, slowly pour in the heavy cream, turn up the speed a bit and mix. Stop and scrape the bowl, then turn it back on and beat until stiff peaks form.

Wednesday, February 13, 2013

Chocolate Turtles


Valentine's Day is tomorrow, so I had to get started on the treats. Not only do I plan to give these to my kids, but the rest will be packaged up and handed out to my family members. Very easy, affordable, and delicious. I did do one thing unusual for this blog though.... I used pre-made caramel squares. Gasp! :) The reason I did, was because I found them in my pantry. I have no idea why I bought them, but they were there, so I used them. Pay close attention to the instructions, I included a good tip on how to keep the caramel off your fingers.


Turtles
Serving Size = About 50
  • 8 oz of caramel
  • 2 tablespoons of heavy whipping cream
  • 10 oz of chocolate (I used 60% cacao)
  • Roughly 10 oz of Pecan Halves (this is the bag size I bought, but I used a little over half)
  • Parchment or wax paper, cooking spray, and some teaspoons
  1. Over a double boiler, melt the caramel with the heavy cream. 
  2. Place two pecans halves a few inches apart on a cookie sheet that has been lined with parchment or wax paper, and then sprayed with oil (I needed 3 cookie sheets). 
  3. Once the caramel has melted, take one measuring teaspoon and scoop out the caramel, then take one of the two pecan halves and scoop the caramel out of the teaspoon and then stick it to the other pecan half. This keeps the caramel off your fingers. Do that with each pair of pecans. Keep doing this until all of the caramel is gone.
  4. Leave them at room temperature for about 15 minutes, until they set up.
  5. In the meantime, melt the chocolate (gently) over a double boiler. When done, scoop 1/2 - 1 teaspoon of chocolate, and pour over each turtle.
  6. When done, place in refrigerator to harden (takes a few hours).
  7. Eat, or gift give..... or both. :)
PS: You could make these in the shape of a turtle, like they are traditionally done, but that's just too much turtle for me. I prefer them bite size.

Linking to: Hearth and Soul

Wednesday, February 6, 2013

Carrot Cake with Pecan Cream Cheese Frosting


After taking a step back and leaving Hearth and Soul, I'm hoping to make more free time to blog. I've been so caught up in my every day schedule of cooking, cleaning, bathing the kids, dishes, taking care of the dog, laundry, work, so on and so on that I rarely take time away. The most  "me time" I take is to go on the internet to check on baby wraps, which I couldn't do any of the previous things mentioned without (click here to see what a baby wrap is).

So I took some time away from the daily schedule, wrapped Emmett on my back, and called Mimi over to help bake a cake. To make myself feel better for feeding my kids a ton of sugar, I added a carrot. It seems healthier that way. I would like to add broccoli as well, but I'm afraid I would be pushing my luck....

Pictured above is a piece of "healthy" carrot cake, broccoli-free, full of yummy cinnamon flavor, very moist, and topped with cream cheese icing that has pecans mixed in. Oh my goodness. I've never liked carrot cake this much before.

Enjoy!


Carrot Cake with Pecan Cream Cheese Frosting
Serving Size = 1 Bundt pan
Adapted from: The Pioneer Woman

Cake
  • 2 cups granulated sugar
  • 4 whole eggs
  • 1 cup oil (I use grapeseed, but vegetable would work)
  • 2 cups all purpose flour
  • 1 teaspoon baking powder
  • 1 teaspoon baking soda
  • 1 teaspoons cinnamon
  • 1/4 teaspoon fresh nutmeg
  • 1/2 teaspoon salt
  • 2 cups grated carrots
  • Butter to grease the pan with
Icing
  • 1 stick butter, softened (unsalted)
  • 1 package (8 oz) cream cheese, softened
  • 1 pound powdered sugar
  • 2 teaspoons vanilla extract
  • 1 cup pecans, chopped finely
  1. Preheat oven to 350F and grease a Bundt pan.
  2. In a mixer, or large bowl, mix together the sugar, eggs, and oil.
  3. In another bowl, mix together the dry ingredients: flour, baking powder, baking soda, salt, cinnamon, nutmeg.
  4. Add the dry ingredients to the wet and mix well. Add the carrots and mix again.
  5. Pour into the pan and bake for 50 minutes, or until done. Let cool for 10 minutes or so, then remove from pan and let cool completely.
  6. For the icing: With a mixer, cream together the butter and cream cheese. Add the powdered sugar and flour. Mix well. Mix in the pecans (I chopped them in a food processor).
  7. Spread over cooled cake.

Wednesday, October 31, 2012

Ka'ak (North African Anise Cookie)


There are many variations of this cookie, but from what I understand, the traditional version requires yeast and has to rise overnight. I know I have the patience for this, but I do not have the ability to plan ahead, so I tend to go with this quick recipe instead. Yeast could still be added (1 teaspoon or so, activated in sugar water), but it would only act as an additional flavor. To make the cookie puff up a bit, I added baking powder instead.

Now, I will warn you, this is a crunchy/hard cookie that's meant to be dipped into coffee, warm milk, or hot tea. So when you remove it from the oven, don't think that you over-baked it. It's very similar to biscotti, actually.

Oh yes.... and Happy Halloween!!!! :)

Grind the fennel seeds
Fennel seeds
Add the fennel and anise seeds to the mixture
Add water until the dough comes together
Roll out the dough
Shape into a circle
Cut into the sides
Brush with egg and bake
Ka'ak (North African Anise Cookie)
Serving Size = 16 cookies
  • 2 cups all purpose flour
  • 3/4 cup of sugar
  • 2 tablespoons sesame seeds, toasted
  • 1 teaspoon fennel seeds, crushed
  • 1 teaspoon anise seeds
  • 1 teaspoon baking powder
  • 1 egg (beat before adding)
  • 1/3 cup oil (flavorless oil, I use grapeseed)
  • Pinch of salt
  • 1 egg for egg wash plus 1 teaspoon water, mixed
  • 1/4 cup water, roughly
  1. Preheat oven to 350F.
  2. Start by toasting the sesame seeds in a dry pan, over medium high heat. It only takes a minute, so watch them. Once they take on a light golden brown color, remove from heat.
  3. Grind the fennel seeds in a mortar and pestle. If you don't have one, put them in a ziplock and crush them with a pan.
  4. Mix together all of the dry ingredients, the fennel, and anise.
  5. Beat the egg for a minute, just until it's mixed, and then add the the cookies. Add the oil and mix. The mixture will be crumbly. Slowly add the water until it combines, pulls away from the sides of the bowl, and forms a ball. You may not need all of the water, so slowly add it.
  6. Divide the dough into 16 pieces. Roll each piece into a cylinder shape, then smash the ends together to form a circle with a hole in the middle (like a doughnut). Place on a greased cookie sheet. Continue doing that until all of them are done.
  7. With a knife, slice into the cookie, all the way to the cookie sheet, cutting completely through, but do not cut the circle in half. So it should still be 1 circle, but with cuts all the way through, around the edges.
  8. Beat 1 egg with 1 teaspoon of water and brush each cookie. There will be enough egg wash for at least 3 batches of cookies, if not more.
  9. Bake for 25 - 30 minutes, or until golden brown (especially the edges). 
  10. Remove from oven and let cool on pan for about 5 minutes, then remove to a wire rack to cool completely.
  11. This is a hard cookie, almost like biscotti, so it's best served with coffee, tea, or warm milk.
Linking to: Gallery of Favorites

Sunday, October 14, 2012

Easy Sugar Cookies


I'm sure some of you have noticed that I've been missing lately. I wish I could say it's because I've been busy doing all kinds of awesome fall activities, having dinner parties, watching movies, relaxing, drinking hot chocolate...... but no. Exhaustion pretty much sums up the last month or two. I blame the season change. My husband is suffering from the same fatigue. Unfortunately, the children are not. They are still their unbelievably energetic little selves.

Still, I'm always doing little activities with the kids. Even if I have to force myself, because let's face it, sitting on the couch can be a little more tempting than cutting pumpkins out of construction paper. Be honest. You know deep down you're a couch potato too. :)

So to keep everyone entertained, and to ensure that I have a snack during my rare couch potato moments, I try to find simple recipes for the kids to make. Sometimes it's bread, pizza dough, cake, pancakes and so on. But the other day it was sugar cookies. Cute, easy, yummy, sugar cookies. I planned to drizzle icing all over them, but then I thought maybe my kids would be eating enough sugar as is, so I skipped it. Probably a wise decision.


Easy Sugar Cookies
Original Recipe
Serving Size = 4 dozen
  • 2 3/4 cups all purpose flour
  • 1 teaspoon baking soda
  • 1/2 teaspoon baking powder
  • 1 cup butter, softened
  • 1 egg
  • 1 cup sugar
  • 1 teaspoon vanilla extract
  1. Preheat oven to 375F.
  2. Cream together the butter and sugar, in a mixer. Add the egg and mix.
  3. Mix together all of the dry ingredients and add to the mixture. Mix until just combined.
  4. Roll round teaspoon fulls, and place onto an ungreased cookie sheet.
  5. Bake 8 - 10 minutes or until golden.
  6. Let cool on wire racks.

Tuesday, September 11, 2012

Yellow Cake (Birthday Cake) with Mocha Fudge Frosting


My son's birthday is right around the corner, so I've been searching for a really good birthday cake. I decided to go with a yellow cake this time and since I had some leftover coffee, I went ahead and made the mocha frosting that I posted the other day. For Emmett's birthday, I plan to just use plain vanilla buttercream instead. After all, it's probably not wise to give a baby coffee. :) So if you want plain, go ahead and replace the coffee with milk. Anyway, the cake has a beautiful crumb, it's not too moist or too dry, I'm really impressed with it. Definitely a keeper.


Yellow Butter Cake
Original Recipe
Serving Size = 2 9-inch layer cakes
  • 1 cup (2 sticks) unsalted butter, room temperature
  • 1 1/2 cups all purpose flour
  • 1 1/2 cups cake flour (not self rising)
  • 1 tablespoon baking powder
  • 1/2 teaspoon salt
  • 1 3/4 cups sugar (I might cut down a bit next time)
  • 4 large eggs
  • 2 teaspoons vanilla extract
  • 1 1/4 cups milk
  1. Preheat the oven to 350F. Grease the pans (you can line with parchment, but I didn't).
  2. In a mixer, mix together the butter and sugar until fluffy. Scrape the sides and add the eggs, one at a time, mixing each one until combined. Beat in the vanilla.
  3. In another bowl, mix together the flours, salt, and baking powder.
  4. With the mixer on low, add the flour mixture in three parts, alternating with the milk, beginning and ending with the flour. Beat until combined after each addition. Beat a few more minutes and then pour into the prepared pans.
  5. Bake for 30 - 35 minutes or until toothpick inserted comes out clean. Transfer pans to a wire rack to cool for 20 minutes. Flip the pans and remove the cakes, let them cool completely before frosting.
Click here for the frosting recipe. If you like lots of frosting, and I do, then I recommend doubling the recipe. The cake above has the amount the original frosting recipe calls for though.
 

Monday, September 3, 2012

Mocha Fudge Frosting


Today, I am sharing a delicious mocha fudge frosting recipe with you that I found over at Premeditated Leftovers. Hands down, this is my new favorite frosting. The coffee takes this standard chocolate frosting and turns it into a real treat. It's almost effortless to make, the flavor of each ingredient is present, and it can be paired up with several different types of cakes (or cookies, or brownies). I put the frosting on vanilla cupcakes and then I stood in the kitchen licking the frosting out of the bowl and drinking milk. Yeah. Healthy AND classy. :)


Mocha Fudge Frosting
Serving Size = 24 cupcakes, or 1 13x9-inch cake
Original Recipe: Premeditated Leftovers
  • 6 tablespoons butter, softened (I used unsalted)
  • 6 tablespoons brewed coffee (plus more, if needed)
  • 6 tablespoons cocoa powder
  • 1 teaspoon vanilla extract
  • 4 cups powdered sugar (plus more, if needed)
  1. In a mixer, mix together the butter, coffee, cocoa powder, and vanilla. When combined, add the powdered sugar. Mix and then adjust to the consistency you want with either more coffee or more powdered sugar. I used more coffee.
  2. Turn up the mixer to medium and mix for a minute or two, until fluffy.

Friday, August 31, 2012

Sweet Potato Pie


As I was walking through the kitchen, with baby Emmett wrapped on my back (see details here), I happened to see some sweet potatoes sitting out, going bad. I knew something complicated was out because of exhaustion, so I tried to think of something simple. I also wanted something that my toddler Mimi could help out with...... Sweet Potato Pie. Sweet, creamy, easy to make, and fun for the kids.

Here are a few tips: 1) Beat the filling until smooth, I stopped a little early. 2) Let it cool completely before you cut into it or it cracks. 3) Slowly add the sugar, tasting as you go (add the eggs last, so you don't eat raw eggs). That way, it doesn't end up too sweet. 4) I used 3 cups of sweet potato, which is a bit much. I would recommend getting closer to 2 cups.


Sweet Potato Pie
Serving Size = 1 9-inch pie
  • 2 cups sweet potato (I used 3, but 2 cups is better)
  • 1/2 cup butter, softened
  • 3/4 cup sugar (start with 1/2 cup and increase to taste)
  • 3/4 cinnamon
  • 1/4 teaspoon ginger
  • 1/4 teaspoon fresh nutmeg
  • 1/2 cup milk
  • 2 eggs
  • 1 teaspoon vanilla extract
  • 1 9-inch pie crust, unbaked (click here for recipe.... I added a tablespoon or two of sugar to the crust)
  1. Boil the sweet potatoes, skin and all, for 40 minutes to an hour. When they are soft (can pierce with fork), run cold water over them and remove skins. Toss the skins. Do not let cool first, or put in the fridge, just run cold water over them. Break into pieces and place into mixer bowl (I used my standing mixer).
  2. Add the butter, spices, sugar (I recommend starting with 1/2 cup and increasing as necessary), vanilla and mix. Taste and increase the sugar if necessary. When it's sweet enough, add the eggs and mix until smooth (about medium speed).
  3. Transfer to an unbaked pie crust and place in a preheated 350F degree over for 60 minutes, or longer. The pie will be set, and a knife inserted should come out mostly clean. The middle shouldn't be a soupy mess.
  4. Remove, let cool, and serve.
Linking to: Gallery of Favorites, Full Plate Thursday

Monday, May 21, 2012

Maple Chocolate Chip Pancake Cookies


Ever since I was a kid, my favorite breakfast has been chocolate chip pancakes with maple syrup. A glass of cold milk, and a stack of over-the-top sweet pancakes is just heaven to me. I could eat this every single day. So one day, I started thinkin'.... why not make this into a cookie? Chocolate chip cookies plus maple cookies, equals chocolate chip pancake cookies! Brilliant! I wish I had thought of this ages ago. The cookies bake up thin, with the texture of a cookie, but leaning towards soft to give it that pancake feel. To give it more maple flavor, I added a small amount of maple frosting to each one.


Maple Chocolate Chip Pancake Cookies
Serving Size = 24
  • 1/2 cup unsalted butter, room temperature (1 stick)
  • 3/4 cup brown sugar
  • 1 egg (large)
  • 3/4 cup maple syrup
  • 1/2 teaspoon vanilla extract
  • 2 1/2 cups all-purpose flour
  • 1 teaspoon baking soda
  • 1/2 teaspoon salt
  • 1/4 teaspoon cinnamon
  • 3/4 cup chocolate chips (I used bittersweet)
  1. Preheat the oven to 350F
  2. Cream together the butter and brown sugar. Add the egg and vanilla and mix.
  3. In a separate bowl, mix together the flour, baking soda, salt, and cinnamon.
  4. Add the maple syrup, mix and then add the dry ingredients. Mix until combined. Add the chocolate chips.
  5. Put about 1 tablespoon onto a cookie sheet, a few inches apart. They will spread out and be a little bit thin.
  6. Cook for 8 - 10 minutes, or until the edges are golden brown. Remove to a wire rack.
Frosting
I did put this together to taste, so adjust as necessary. You do not want it dripping off the cookies, so add enough powdered sugar to thicken it up a tiny bit.
  • 1 - 2 tablespoons maple syrup
  • 1/2 tablespoon milk, just a tiny amount, enough to thin it out a tiny bit
  • Powdered sugar
  1. Mix together the syrup and milk. Add powdered sugar until it thickens. It won't be thick like buttercream, but it will stay on top of the cookie when you frost it.
Assemble
  1. Add a tiny bit of frosting to the top of each cookie.
And don‘t forget to enter my giveaway! :)

Monday, April 23, 2012

Vanilla Bean Scones with Vanilla Bean Icing


The kids and I were alone the other day while my husband was working on a construction project. I decided that the house desperately needed some cleaning. I did the usual and put the TV on so I could listen to FoodNetwork while I worked. I was making real progress and then...... the Pioneer Woman made vanilla scones. So there I was, trying to focus on cleaning, but now my mind was stuck on yummy, sweet, warm vanilla scones with icing drizzled over them. And made with REAL vanilla beans too. Those little black specs make all the difference, they really do. So, I ignored the giant pile of dishes, and the mounds of laundry, and instead started baking.

Unfortunately, in my hurry to bake and eat them, I forgot they were MINI scones and instead I left them normal sized. That's ok though, no complaints here. :) I give this recipe two thumbs up. It was totally worth the extra dishes and the giant flour mess on the floor created by my toddler helper.

Heavy cream and vanilla beans
Vanilla beans
Flour mixture
Scones
Vanilla bean glaze

Vanilla Bean Scones with Vanilla Bean Icing
Serving Size = 12 regular scones or 24 mini scones
Adapted From: Pioneer Woman

Scones
  • 2 whole vanilla beans
  • 3/4 cup heavy cream
  • 3 cups all-purpose flour
  • 2/3 cups sugar
  • 5 teaspoons baking powder
  • 1/4 teaspoon salt
  • 2 sticks (1/2 lb) unsalted butter, cold
  • 1 whole egg
Glaze
  • 1 whole vanilla bean
  • 1/8 - 1/4 cup milk
  • 2 1/2 cups powdered sugar
  1. Preheat oven to 350F and grease a baking sheet.
  2. Split each vanilla bean in half and scrape out the vanilla "caviar." Add the caviar to the heavy cream and set aside for 15 minutes.
  3. In a large bowl, mix together the flour, sugar, baking powder, and salt. Mix and then add the cold butter and cut it into the flour with your hands, pastry cutter, fork, or a food processor. It should resemble course crumbs. Try to work quickly.
  4. Mix an egg into the heavy cream and vanilla.
  5. Mix together the heavy cream mixture and flour mixture until just combined.
  6. Pour out onto a lightly floured counter top or cutting board. Form into a 12x7-inch rectangle, about 1/2 - 3/4-inches thick. Cut into 12 triangles for regular size, or cut into 12 rectangles and then cut each one in half to cream a triangle to make mini scones.
  7. Place onto a baking sheet and bake for 18 minutes, or until they are just about to turn golden brown. Let cool on the baking sheet for 15 minutes. Remove to a wire rack and cool completely.
  8. For the glaze, split the vanilla bean and remove the caviar, add to the milk and set aside for 15 minutes. Then combine the powdered sugar and milk mixture until it reaches desired texture. Put into a pastry bag, or a zip lock with the tip cut off, and drizzle over the scones.