Wednesday, October 5, 2016

North African Biscotti


I'm not sure what to start with, so I guess I'll just say hello. It's been a while. Life had kept me busy, blogging has been on my mind, and I've finally found the time to start it up again. So if you've been following me for a while, and you're back here reading this post, thank you! I'll give a quick life update and then go on to the real reason we're here, the food. If you remember, I had a 5 year old girl, Mimi, and a newborn boy, EE. They've now grown up to a 7 year old and a 5 year old, and we welcomed a baby girl 2 years ago, baby Ru. We've also moved to a new house, I quit my part-time job and my husband increased his work hours. Like I said, we've been busy! But it's good to be back!

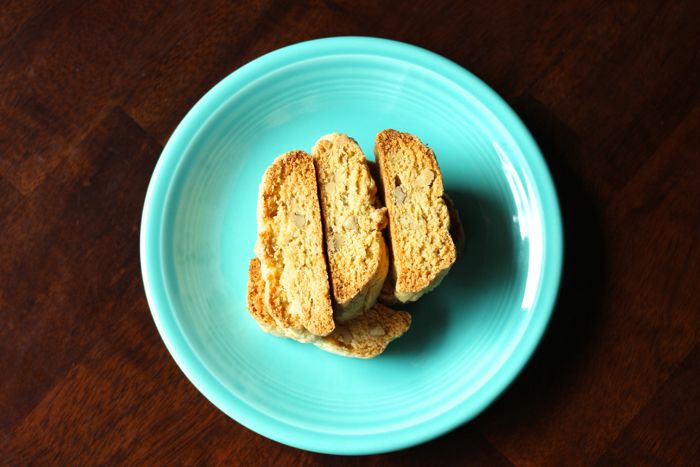
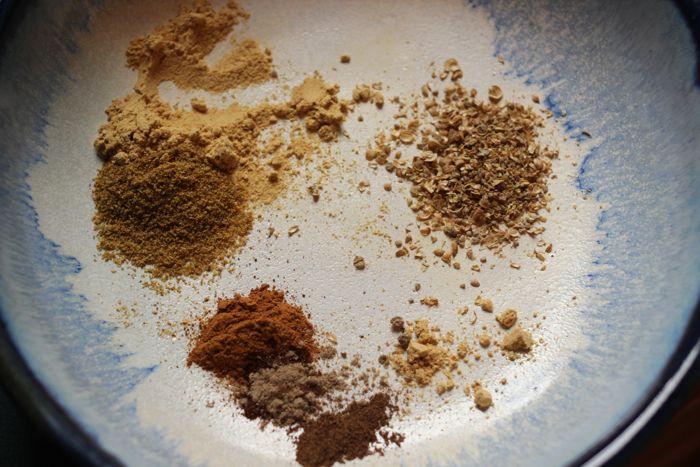
And now to the recipe. I love North African flavors, so I added them to a simple biscotti recipe. You'll notice that I didn't add extract of any kind. The reason I skip that is because I feel like it always over powers the dish, no matter how little I add, so I prefer to skip it. Feel free to add almond or vanilla extract though.

After adding the flour, do not over mix
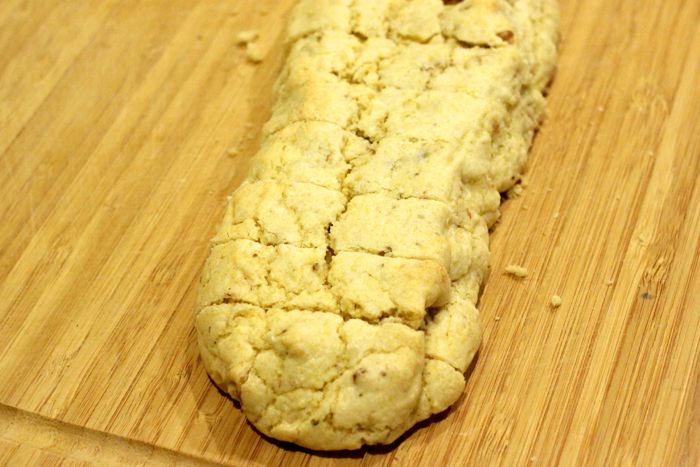
Shape into logs
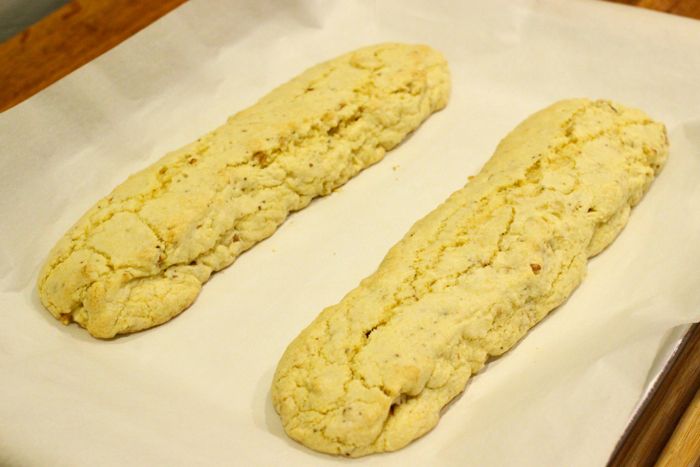
Bake and then remove
Cut and return to oven
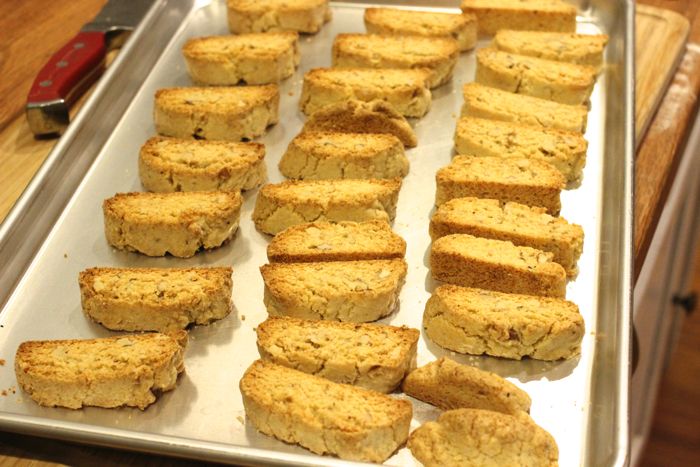
Done when golden brown

North African Biscotti
Serving Size = 20+
  • 1 1/2 cups all-purpose flour
  • 1 1/2 teaspoons baking powder
  • 1/4 teaspoon salt
  • 1/2 cup yellow cornmeal
  • 2 teaspoons anise seed, ground
  • 1 teaspoon fennel seed, ground
  • 1 stick unsalted butter, at room temperature
  • 1 cup brown sugar
  • 2 large eggs
  • 3/4 cup finely chopped toasted almonds or walnuts
  1. Move rack to the center of the oven and preheat to 350F.
  2. Line a baking sheet with parchment paper.
  3. Whisk together the salt, baking powder, flour and cornmeal.
  4. With a stand mixer and paddle attachment, beat the butter and sugar together on medium speed for about 3 minutes, until very smooth (a hand mixer would work as well). Add the eggs, one at a time and beat for another 2 minutes, making sure to scrape the bowl. Add the ground anise and fennel.
  5. Reduce the speed to low and add the dry ingredients and the nuts, mixing only until incorporated.
  6. Divide the mixture in half, creating two 12 x 1 1/2 inch logs. The dough is sticky and the logs will be uneven.
  7. Bake for 15 minutes, or until the logs are lightly golden, but still soft and springy when touched.
  8. Transfer the baking sheet to a cooling rack for 30 minutes.
  9. Using a wide metal spatula, transfer the logs to a cutting board. With a serrated knife, cut across the logs to create short biscotti that are 3/4 inch pieces. Return the pieces to the baking sheet, standing them up on their short side and bake for another 15-20 minutes or until golden and firm.
  10. Transfer to a cooling rack and then serve.

Thursday, September 26, 2013

Egg Free, Dairy Free Chocolate Cake, Whipped Cream Cheese Frosting


During times when I desperately need to grocery shop, but the kids are asking for dessert, this is the recipe that I turn to. The cake is both egg and dairy free, so it is not only good for an empty fridge, but for people with allergies. It is very moist and light, with lots of chocolate flavor, but not overly sweet. The frosting is similar to whipped cream, very light, but cream cheese is added to help it along. Of course, the topping is not dairy free, so feel free to use another frosting if you're allergic.

Egg Free, Dairy Free Chocolate Cake
Serving Size = 1 9x13-inch pan
  • 3 cups all purpose flour
  • 1 teaspoon salt
  • 2 teaspoons baking soda
  • 1/2 cup unsweetened cocoa powder
  • 1 3/4 cups white sugar
  • 3/4 cup oil (I use grapeseed)
  • 2 tablespoons distilled white vinegar
  • 2 1/2 teaspoons pure vanilla extract
  • 2 cups cold water
  1. Preheat oven to 350F.
  2. Stir all of the dry ingredients together. 
  3. Add the wet ingredients and mix until combined well. I do not even use a mixer for this, just a spoon or fork.
  4. Pour into an ungreased 9x13-inch pan. Bake for 35 - 40 mins, or until toothpick comes out clean.
Whipped Cream Cheese Frosting
Serving Size = Enough to cover 9x13-in pan. Probably 4 or 5 cups.
  • 1 8-oz package of cream cheese softened to room temperature
  • 2 cups white sugar
  • 1 teaspoon vanilla extract
  • 2 cups heavy whipping cream
  1. Using a stand mixer with a whisk attachment, beat together the cream cheese and sugar until smooth, over medium speed. Add the vanilla. 
  2. When combined, slowly pour in the heavy cream, turn up the speed a bit and mix. Stop and scrape the bowl, then turn it back on and beat until stiff peaks form.

Tuesday, July 30, 2013

Mushroom, Pea, and Fennel Cream Risotto


Risotto is very common at our house. It gives any meal a touch of elegance and I walk away feeling like a master chef. In reality, it's an easy dish to prepare. People are often intimidated by it, but there is nothing to stress over. You do have to babysit it for about 20 mins, and that's the hardest part. Risotto that is too dry is the common complaint. I am a mom of two small kids, so walking away from the stove, forgetting about the risotto, and over cooking it to dryness does happen. A trick to help save that is to always have some heavy cream reducing. It will not be risotto perfection, but it can save a possible disaster. For risotto that has been cooked perfectly, it is a nice creamy boost. I love to add a mountain of Parmesan to my risotto, which thickens it a bit, so again, the cream helps loosen up the rice a bit. Since I am reducing heavy cream anyway, I like to infuse it with flavor. For this dish, I used fennel seeds. This gives it a touch of fennel flavor, but it won't over power it.

Feel free to change up this dish with some other veggies. Asparagus is a very good addition, or maybe different types of mushrooms. You could also turn this into a full meal by adding shrimp. Or garnish is with crumbled up pancetta or bacon.

 
Mushroom, Pea, and Fennel Cream Risotto
Serving Size = 4 - 5
  • 1/2 cup heavy whipping cream
  • 1 - 1 1/2 teaspoons fennel seeds (I eye it)
  • 1 cup risotto
  • 3 cups stock, warm (I used chicken stock)
  • 1 tablespoon butter
  • 1 tablespoon or so of extra virgin olive oil
  • 1 cup fresh Parmesan
  • 8 or so mushrooms, chopped
  • 1/2 small white onion, finely chopped
  • 2 - 3 cloves garlic, chopped
  • Salt (1 teaspoon or so)
  • 1/2 cup or so frozen peas
  • Zest of 1 lemon
  1. In a medium saucepan, preferably with a wide bottom, melt the oil and butter over medium heat. Add the onions and saute for a bit, then add the mushrooms. Saute until golden. Add the zest, garlic, and rice. Toast the rice for a few minutes.
  2. Reduce the heat to medium-low and add about 1/2 cup of stock and the salt. Stir. Keep it at a very gentle simmer. It will start out soupy, but as the liquid absorbs it will thicken up. When you stir and can start to see the bottom of the pan, add around 1/4 cup of stock. 
  3. In the meantime, start the fennel cream. Mix them together in a small saucepan over medium heat and gently boil until reduced by about half. When done, strain out the seeds and set aside.
  4. Keep adding the stock to the risotto until there is no more stock (should take around 20 mins). Taste to make sure it's done, if not, add more stock or water. Stir in the peas when you add the last bit of stock. Check the seasoning. Remove from heat and stir in the cheese. Gently stir in the heavy cream. Check seasoning, again (the key to good rice).
  5. The final product shouldn't be too dry. When you serve it on a plate, the risotto should spread out just a bit and then stop. It will not be soupy, or dry like white rice.
Linking to: Hearth and Soul

Monday, July 22, 2013

Rosemary Grilled Lamb Loin Chops


One of my new favorite recipes, rosemary and garlic marinated lamb. Oh, drool. Cooked to a perfect medium, very tender, with a hint of rosemary. The marinade is not so powerful that you lose the lamb, but just enough to elevate it. A special thanks to Giada De Laurentiis and my garden for this recipe. :)


Rosemary Grilled Lamb Loin Chops
Serving Size = 2
Original Recipe
  • 6, 3/4 inch lamb loin chops
  • 2 cloves garlic
  • 1 tablespoon fresh rosemary
  • 1 teaspoon fresh thyme (I used dry)
  • About 1 teaspoon of salt, to taste
  • Pinch of cayenne pepper
  • 2 tablespoons extra virgin olive oil
  1. Place everything except the lamb in a food processor and blend, or just finely chop everything. I prefer chopping everything. And to get the salt right, I like to sprinkle the salt on one side of the lamb and then the other, and then rubbing it all in. I just find this easier than pouring in the salt and guessing
  2. Place the lamb in the marinade, cover, and refrigerate for 1 hour. Remove from fridge and let come to room temperature, which takes about 20 minutes.
  3. Heat up the grill, and cook the lamb for about 3 1/2 mins per side, which should make it medium.

Tuesday, July 9, 2013

Tabouli Salad


To accompany many of my spicy North African and Middle Eastern dishes, I decided to share a Tabouli salad. It doesn't require any spices, so it's mild, but the heavy amount of parsley really marries well with any spicy dish. It creates balance by adding something light to the heavy meals. Everything can be adjusted according to taste. Feel free to add more tomato, or change the dressing. I eat this with a meal, and not as a salad alone. If I ate it as a salad alone, I would add more tomatoes, scallions, and even cucumber. We've had it with couscous, kebabs, and different tagine recipes. I love it with pita bread and hummus as well.


Tabouli Salad
Serving Size = 2
  • 1/4 cup of bulgur, soaked for 2 1/2 hours
  • 2 cups or so of Italian Parsley, finely chopped
  • 1 scallion, finely chopped
  • 1 tomato, chopped
Dressing
  • 1 - 2 tablespoons lemon juice
  • 2 - 3 tablespoons oil (EVOO, grapeseed, I used walnut oil)
  • 1 - 2 teaspoons honey
  • Salt, about 1/4 - 1/2 teaspoon
  • Black pepper
(All to taste)
  1. Drain the bulgur and squeeze out excess water.
  2. Mix together all of the ingredients for the salad.
  3. Mix together all of the dressing ingredients.
  4. Combine and serve. 
Linking to: Hearth and Soul

Tuesday, July 2, 2013

Spiced Pearl Couscous


I've posted a few couscous recipes in the past, but this time I wanted to share a spicy version with you. Spicy as in flavorful, not heat. If you want heat, go ahead and add some ground cayenne pepper. I served this as a side to lamb kabobs, pita bread, hummus, and grilled veggies. It really stood on its own, without being too powerful. Oddly enough, my favorite thing about this recipe is the warm fragrance it has from all of the warm spices. I wish I could bottle it up and spray it everywhere. It adds something special to the meal.


Spiced Pearl Couscous
Serving Size = 2 - 3
  • 1/2 onion, finely chopped
  • 1/2 green pepper, finely chopped
  • 1 1/8 cups stock (beef, chicken, or vegetable)
  • Oil (EVOO is what I used)
  • 1 cup pearl couscous
  • 1/2 teaspoon salt (optional)
  • 2 - 3 cloves garlic, finely chopped
  • Lemon zest, 1 lemon
  • 1/2 cup parsley
  • Black pepper (optional)
  • 1 teaspoon cumin
  • 1/2 teaspoon ginger
  • 1/4 teaspoon cinnamon
  • 1/8 teaspoon cloves
  • 1/8 teaspoon allspice
  • 1/8 teaspoon cardamom
  • 1/2 teaspoon ground coriander
  1. Add a few tablespoons of oil to a medium saucepan, over medium heat. Saute the onions for a few minutes, then add the garlic and peppers. Cook until it all softens a bit.
  2. Add the spices and cook for a few minutes. Add the stock and raise heat, bring to boil.
  3. Once it's at a boil, add the couscous and stir. Cover and reduce heat to a gentle simmer.
  4. Cook for 8 - 10 minutes.

Tuesday, June 25, 2013

Oatmeal, Carrot, Apple Muffins


I like to make these for breakfast, and then we snack on them throughout the day. They're not too sweet, and they have carrots, so that makes them healthy in my book. :) Feel free to add whatever fruit or nuts you have, I am sure just about anything would work.


Oatmeal, Carrot, Apple Muffins
Serving Size = 12 muffins
Adapted from
  • 2 cups oats, ground
  • 1/4 cup of flour
  • 2 teaspoons baking powder
  • 1/2 teaspoon salt
  • 1 teaspoon cinnamon
  • 1/2 teaspoon ginger
  • 2 eggs
  • 1/2 cup oil, I use grapeseed
  • 1/2 cup of sugar, brown would be best
  • 1/4 cup raisins
  • 2 large carrots, grated (1 cup)
  • 1 apple, peeled and grated
  1. Preheat oven to 400F, grease a muffin pan very well. These tend to stick, so lining with muffin cups would be ideal.
  2. In a food processor or Vitamix, grind the oats for a minute, until you have something like cornmeal.
  3. Mix together all dry ingredients. Add wet ingredients and mix until just combined. Stir in the carrot, apple, and raisins. Do not over mix.
  4. Fill up muffin pan and bake for 25 minutes, or until a toothpick inserted comes out clean. Let cool.